Sunday, June 15, 2014

Shabby Chic Shelving

I am truly a fan of shabby chic. I find the details and the interest created by the distressed paint beautiful. There are many places where you can pick up your own pieces, ready to hang or you can create your own with little effort.


DIY Your Own Shelving

1. Browse flea markets, antique stores, thrift markets etc. to find a suitable shelf for your project. Look for pieces that have interesting detail, have no structural damage or missing pieces.
2. Clean wooden shelf using a scrub brush, toothpicks and old toothbrushes to remove all the built up dirt and grime.
3. Scrap off any loose paint and apply paint stripper as needed.
4. Sand the item well and use a product such Americana Decor Chalky Finish ($14.99 at Michaels) paint in desired colour. I personally like to use white or pastel colours. Additionally this paint is good on a variety of different surfaces such as wood, glass, metal, and cabinets.


5. Once desired colour is achieved, use fine sandpaper to "distress" the finished piece. This will give it an aged and worn look.

Love the Knobs on these Shelves


Beautiful Details on these Shelves


Your imagination is the only limit to your creativity! What I really love about shabby chic is that everything does not have to match. The beauty is in the imperfections.

Outside inspiration

With summer upon us and the desire to spend as much time as we can outside, take the opportunity to create an outdoor living space on your condo balcony. Small spaces can be beautiful!

Colour
- start with a basic condo sectional (available at many retailers including Canadian Tire, Walmart, and Ikea)
- add interest through pillows, table clothes, dishes in contrasting colours and patterns as seen below


Turn your outdoor space into an outdoor eating area
- use a small table and folding wooden chair(s)
- add interest with contrasting seat cushions and potted plants at varying levels (on the balcony floor and on the table)


Gardens
- add greenery and florals to your outdoor living space by adding planters


Creative Planting
- add a creative planter to your outdoor space which adds colour and interest to your balcony


Lighting
- there are so many beautiful lighting options for outdoor living which are dual purpose - light and insecticide to keep away the bugs


Friday, June 13, 2014

Dinner party inspiration

There is nothing more inviting than a beautifully decorated table! With a few suggestions your table can go from drab to fab using seasonal inspiration and a little imagination.


Steps to a beautiful table setting:

1. Start with a table cloth to suit your theme. In the picture above a simple white table cloth is a beautiful backdrop.
2. Add placemats based on your theme and colour. Above the placemats are gold.
3. Layer different plates - various sizes and colours (some bordered and some not)
4. Coordinate the napkin and place either at the side under the cutlery or on top of place for added interest.
5. Optional ornament placed on the plate - in the above photo there is a Christmas tree candle.
6. In the centre of the table use candles, decorations and/or flowers to further add interest and beauty to the table. Above in the Christmas theme Christmas tree ornaments, Christmas tree candles, tea lights, silver/gold candles, and chandler candles. Play around with the placement of items until you have achieved the desired affect.

Spring Theme
- Add interest and beauty by layering dishes, textured placemats and beautiful spring daffodils.


Simple Elegance:
- Choose a beautiful background colour for the placemat, coorindating napkins and wrap the plates as shown below with an elegant satin ribbon tied in a bow.


Country Simplicity:
- White on white theme (table cloth, napkins, plates, candles, flowers) tie with a simple gingham ribbon with heart cookie threaded through. Beautiful white flowers in a small aluminum can adds to the simplicity of the theme.


Black and White Theme:
- Use various black and white patterns to add interest to this table setting. Layer the patterns in the placemat, napkin and ornamental box. Simple white dishes are show cased in this black and white theme.


Nautical Theme:
- add a roped placemat and napkin ring, striped napkin and alternating white and blue plate


Napkin Interest:
- layer two napkins (in photo the solid colour is on the inside and bordered napkin on the exterior), encase with a beautiful napkin ring

Summer Fresh:
- there are so many beautiful themed dishes on the market, these ones pictured below are available at Peer One
- choose a dominant colour in the dinner ware and pick up the colour in the placemats (there are two placements layered in the photo
- layer two coloured napkins (yellow and green in the photo) and hold with a simple napkin ring
TIP: keep the napkins simple when the dinner ware are patterned


Wall Of Frames

That empty wall a sore spot in your house ? I have a few simple and easy ideas to cover your blank canvas!


As I was walking down Queen St West the other day, I came across a tiny little antique shop that had a variety of old beat up picture frames.  They were of all different shapes, sizes, and styles but I picked them up thinking I could fix them up.  I had recalled seeing a picture of white frames on a white wall on the internet and thought these would be perfect to try this project out.

I know they don't look like much now but I will show you how to create something similar to my inspiration pictures below.


Products Needed for the Project:
a few frames of various sizes, damp cloth, fine sandpaper, white primer paint, glossy white paint

Follow these simple steps:
1. Take a damp cloth and remove any dirt or dust that may have accumulated over time.
2. Take your piece of sandpaper and sand down any rough edges (it doesn't have to be perfect as that is part of the look and feel of this project)
3. Paint with white primer base coat.
4. Allow to dry for several hours.
5. Allow glossy white paint. Allow to dry and reapply if necessary.
6. Arrange frames on wall - place at various heights and distances apart. The art is in the final product.


This simple project can really liven up a hallway.
TIP: The more variety of frames you use, the more dramatic the final project.


Sparkly Mason Jars

Have some old mason jars at home and no idea what to do with them? Here is a quick and easy way to jazz them up and add some sparkle to your room.


Items you will need:

1. Mason Jars
- several in good condition (no cracks or chips)
- can be of various sizes to create interest
- can be obtained from garage sales, Canadian Tire, Walmart in the $2 range
2. Krylon Spray Paint
- Metallic Gold or any of the below gold's will work
- can be purchased at your local craft store like Michael's, Walmart, or Canadian Tire
- costs around $ 6-8


3. Glossy Mod Podge
- Purchased at Michael's craft store
- Costs under $10 ( a little bit goes a long way)


3. Paint Brush
4. Recollections or Martha Stewart Glitter
- Purchased at Michael's craft store but any sort of fine glitter will do


Directions
1. Clean your mason jar and turn upside down for an hour to dry.
2.Turn your jar upside down on a piece of cardboard and spray your jar with spray paint about 5 - 8 inches away from the jar.  Aim for a thin covering. Allow to dry for an hour and repeat this step until desired shade.

3. Once your jar is dry, use a paint brush to apply a thin coat of Mod Podge covering the bottom portion of the jar.
4. Sprinkle glitter on portion with Mod Podge.
5. When dry, apply another coat of Mod Podge on top of the glitter to seal glitter.
6. If desired add flowers or other ornaments.


Thursday, June 12, 2014

My Recent Inspirations!

Recently I have been come across many items and inspirational pictures that are inspiring my next projects.

Colour
- easy way to add colour to a room on a sidetable, bookshelf or coffee table
- complementary shades of pink and orange are picked up in the colour of the flowers


Subtle Shades of Colour
- beautiful shade of paint that is slightly aqua
- colour picked up in the colour of the door and the planter


Simplicity
- so simple, yet so beautiful


Pop of Colour 
- using shades of pink through out the condo (table, fridge, glasses, pillows, couch)


Beautiful Aqua
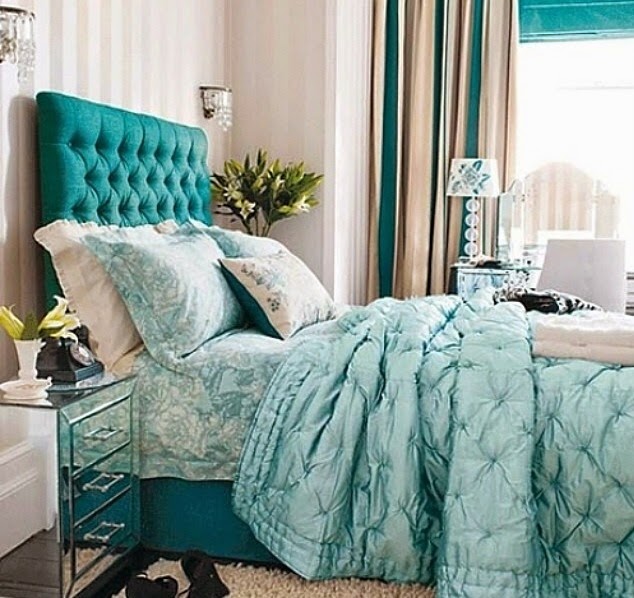
- one of my favourite colours used here in varying shades to create a beautiful bedroom setting


Comfort & Practicality
- love the use of the couch next to the table which would be so comfortable
- dual purpose for couch as dinner seating in a condo or small room